A lot of the moments of his life tends to capture a person on a film: and bright festivities, and just happy moments. Despite the fact that less and less modern people send photos to print, preferring to store them in computer memory or showing photos to friends on social networks, the frame with family photos attached to the wall does not go out of circulation. Happy faces should have a beautiful frame. You can, of course, buy a finished photo frame, but it will be much more interesting and all the more valuable if you make a photo frame with your own hands. Moreover, this process does not require special skills.
Method number 1

The easiest way to make a photo frame will take about ten minutes.
We will need:
Color cardboard
Scissors, glue
Ruler, pencils, colored stickers.
Step 1.
Cut out the future frame from color cardboard. We select the size based on our preferences.
Step 2
Inside the frame, cut out a rectangle - the hole for the photograph, it should be slightly smaller than the photograph itself. Retreat at least a centimeter on each side.

Step 3
Next, you need to decorate the frame, frame it with stickers, draw a picture with a pencil or sign who is depicted and where the photo was taken. You can arm yourself with glue and dead wood - you get an autumn ensemble.

Step 4
At the final stage, you need to glue the back to the frame. To do this, you need a plain sheet of paper. We glue it on the frame in three places so that you can pass the photo through the non-glued side. The frame is ready!
Method number 2

This method is also not labor intensive, it can be called environmental.
Would need:
• Wooden sticks or twigs the thickness of a finger
• Hot glue gun
• A sheet of thick paper or cardboard
Step 1.
Branches or branches can be cut in the nearest park, only it is better to choose dried specimens. Cut 8 pieces of approximately the same length. The branches should be more or less even, small protruding knots and slight thickenings / distortions will add authenticity to the work.
Step 2

We proceed to the manufacture of the framework itself. To do this, sticking together branches with a hot glue gun, collect the base for the frame. It is better to collect the sides of the frame immediately, and not in turn, twisting the branches between the bottom side, side parts, and the upper section.
Step 3

In conclusion, the frame can be decorated with dry flowers - they can be bought or torn in the same park and dried. The frame itself can be painted with spray paint, if you wish.
Method number 3.

To make such a frame, you need a base frame. It can be purchased at an art store, you can take the simplest.
Need to:
• Photo frame
• Fabric, braid
• Glue gun, scissors
The manufacture is simple - we wrap the frame with a cloth, cut off the excess, carefully fix with a glue gun, decorate with a satin ribbon, tie a bow. Voila!
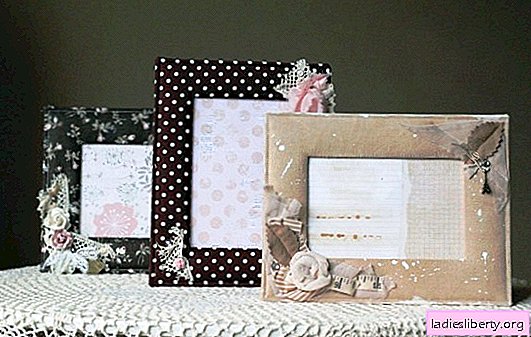
In principle, the finished foundation is a huge field for creativity. The frame can be made using decoupage technique, or armed with unnecessary buttons and glue, decorate the surface. A little imagination - an ordinary and boring frame will decorate the house and add more comfort to it.
How to make a frame for a picture with your own hands
Making a frame for a picture as a whole is no different from making a frame for a photo. The difference is that the picture itself dictates what the frame should be. In this regard, photography is simpler for the frame.
First you need to decide - we will use the finished frame and decorate it, or make the frame yourself from scratch.
Method number 1

To make such a frame, you will need:
• slats,
• goniometer,
• construction stapler or small carnations
• hacksaw.
We set the goniometer on the rail 45 degrees, saw off unnecessary material. If notches have formed, we process with coarse sandpaper. Reiki are fastened with a stapler or small studs, on the reverse side. The frame is ready.

Sometimes the picture dictates strict rules - in such cases, the frame should be rich or artsy. For the manufacture of such frames, you can use moldings. They are purchased at a hardware store, in the "Everything for Ceilings" department.

The frame for the picture is made according to the method indicated above, but instead of a hacksaw, you can use a very sharp clerical knife. The frame can be painted on top with acrylic paint.
Two more environmental options

Branches can be attached directly to the picture - such a frame will not bear the functional load - to hold the picture. But it will mark the borders, by the way, the frame can be covered with glossy varnish - the branches will shine. Corners are connected by twine.
Another option that can be built on the finished surface is to stick the saw with a hot glue gun. Sawing such centimeter rounds is a matter of 10 minutes, for this you need to choose a dried birch bar.

Before gluing the saw cut to the frame, it should be varnished - so the details are better preserved.